Hey there, sport enthusiasts! Do you often have to re-inflate your sports ball but just stick the needle in and pump without thinking? After reading this article you’ll know how to keep your ball inflated longer and never again have to wonder if you’re inflating it properly.
Before we get started, though, a note on equipment. In general, there are two types of hand ball pumps: standard ball pumps and dual action ball pumps. We recommend that you use a dual action pump when inflating your ball because, unlike with standard ball pumps, no air or effort is wasted. Alternatively, you can use an electric air pump for quick inflation at home.
Finding the proper PSI – and why it’s important
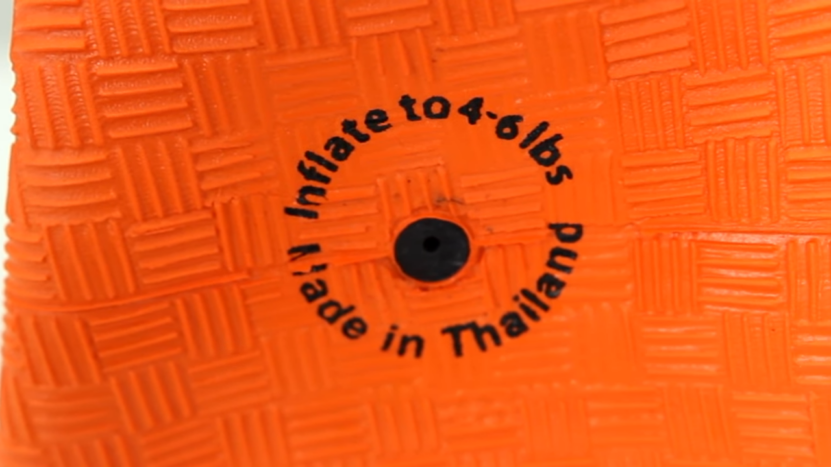
So first things first: to get the most out of your ball, you should follow the manufacturer’s PSI recommendation—usually printed next to the valve on the ball in words like INFLATE TO 8-10 PSI—when inflating it. The PSI is the recommended number of pounds of air pressure per square inch (Pounds per Square Inch) inside the ball and tells you what pressure works best with your ball. Each type and size of ball will have a different optimal PSI level, so pay close attention.
Inflating your ball to the proper level is crucial to ensure it maintains its bounce and bounces in the proper direction (without wobbling). If a ball doesn’t function or bounce as it’s expected to, it’s going toaffect drills or gameplay, no matter how good the players are at that particular sport.It’s important not to over-inflate the ball as well, as this can weaken the stitching on the ball or in worst case scenarios, burst the bladder inside.
Note: Apart from the PSI unit of measurement for air pressure there is also the BAR, a metric unit of air pressure using kilograms that one may come across in recommended inflation values printed on sports balls manufactured in continental Europe. You can find a quick conversion calculator online, but in general,1.0 BAR equals 14.5 PSI so if a soccer ball has a recommended pressure of 0.6 BAR you can multiply that by14.5 to get the recommended PSI level: 8.7 PSI.
Inflating your ball
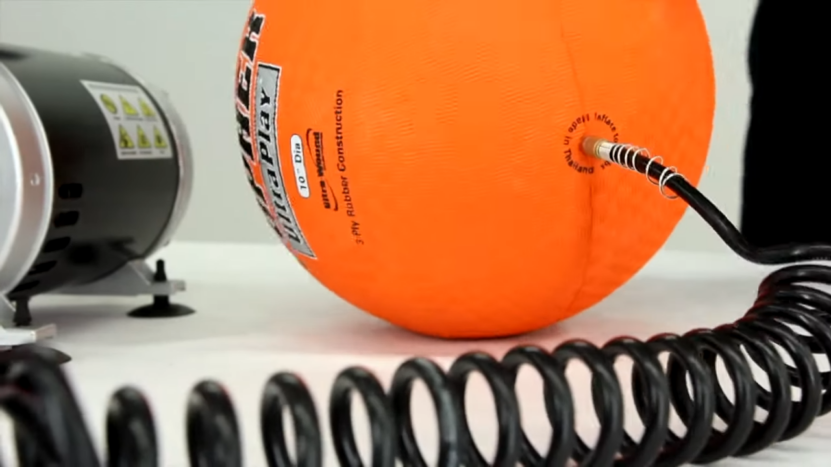
Once you know what PSI you’re aiming for, you need to actually pump in the air. Before you do that, though, there’s one more thing you need to do: moisten the needle of your ball pump with glycerin or oil. (We do not recommend using saliva or water to lubricate the needle as this is abrasive and rubber repels water, so the needle will not become lubricated and can often damage the bladder or valve of your ball.)
Next, insert the needle into the ball at a slight angle and hold the needle steady while pumping as a wobbling needle can damage your ball or ball pump. Pump the ball pump lever up and down slowly to avoid rupturing the ball’s bladder and continue until you think you’ve reached the appropriate inflation level.
At this point, we recommend you use an air pressure gauge to check whether your ball is at the correct pressure level. A good gauge, like the Fitness Factor Air Gauge, will measure the exact amount of pressure in a ball so you know you’ve got it right before putting away your ball pump and starting to play. And, if the ball is overinflated, the gauge has the ability to quickly release air from the ball and bring the ball pressure down to the recommended PSI.
Troubleshooting
What to do if your ball is losing pressure too fast: If your ball is losing pressure within one or two days of inflation, it may be due to dirt in the valve or the valve being dry, which can stop it from sealing properly. This problem can usually be fixed by clearing the valve as follows: Drip 1-2 drops of oil into the valve. Then, insert the inflating needle into the valve and rotate the needle by rotating the end of it in a small circle, also moving the needle gently up and down. The dirt obstructing the valve will be cleared by the oil and the valve should seal.
How to extend the life of your ball
You will want to be able to use your lucky sports ball and extend her life for a long time, right? Sports balls last longer if you reduce the air pressure inside them after a game. It lowers the amount of stress on the ball seams and stitching so they last longer. Also, any ball used outdoors will show wear more quickly than with indoor use. The more you play outdoors, and the rougher the surface of the play area, the faster the outer skin will lose its grip.
Average PSI ranges by sport
Everybody, you should follow the printing on the ball to find the optimal PSI, but we’ve included this information as a rough guide for those who are curious.
How to fix a leak
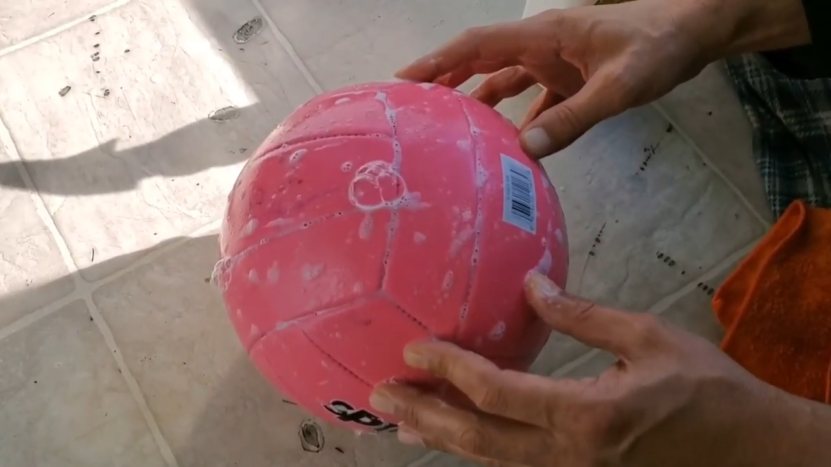
We so enjoy playing our favorite sports with our favorite balls and that unfortunately brings with it occasional damage that may lead to a leak or tear in the ball or the valve that affects the balls’ integrity and usability. When a leak occurs in your ball, there are simple steps you can take to fix it before giving up on the ball completely.
First, acting quickly to repair a ball leak will lengthen its life significantly and get you back to the game faster.
To get started, you need to locate the air leak. To do so,inflate your ball and put it in a bucket filled with water. Look for any bubble streams coming out of the ball to identify leaks and leak locations. Note that bubbles coming from the seams may be coming from the space between the ball’s panel and bladder, and not necessarily a leak. Those bubbles will stop once the trapped air is released. Continuous bubbles signify a leak. Mark the ball where any leaks are present.
If bubbles are coming out from the center of the valve, the ball has a defective valve. First, attempt to clean the valve with a wet inflating needle inserted a few times to wash away dirt and debris. If the leak persists, replace the valve with a new, compatible valve. Soak a compatible new valve in soapy water. Insert the new valve into the opening of the ball and screw it tightly into place. Inflate the ball and leave it for 24 hours to ensure leaking does not continue and the valve is secure.
If the leak is coming from the surface of the ball, there is likely a small puncture in the bladder and/or surface causing the leak. To fix this leak, inflate the ball until it is about 75 percent full. Use a ball repair sealant that can be found at your local sporting goods store.
Moisten the sealant can’s needle with water and then push it all the way into the valve. Spray the repair sealant into the ball for five to six seconds. Inflate the ball fully. Bounce the ball 10 times to allow the sealant to spread evenly on the inside of the ball’s bladder, then let the ball sit for an hour with the leak location facing the ground to allow the sealant to settle. Retest for leaks by placing the ball into the water to locate any additional leaks and test the sealant.
Another option for repairing a surface leak without a sealant is by heating the blade of a knife or screwdriver by moving it back and forth over a flame. Rub the blade over the leaky area until the vinyl melts. Let the vinyl harden for at least five minutes. Re-inflate the ball and test for leaks again. Bicycle tire tube patch kits can also be used to repair a leaking sports ball. Just simply follow the instructions provided in the tube patch kit.
So there you have it, sports lovers! Don’t forget to get yourselves a good quality ball pump and air pressure gauge and follow the above tips to inflate your balls properly and keep them bouncing for a very long time to come.